Related Articles


I love pineapples. The juicy, succulent fruit makes for a great addition to a fruit salad or even to a platter of grilled food.
But, did you know that canned pineapple slices make for one of the most decadent of cakes?
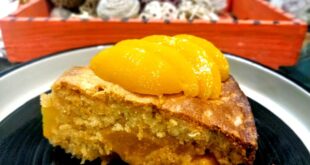
Yes, I am talking about the pineapple upside down cake with is suffused with the moist, dense and juicy goodness of sweet pineapples and cherries. The cake makes for an amazing addition to the Sunday brunch or even as a sweet accompaniment to a picnic or family meal.
And, it is pretty simple to put together and bake. Trust me!
Here is how you can do it.
PINEAPPLE UPSIDE DOWN CAKE
INGREDIENTS
For the cake
- 1 ½ cups of all purpose flour/maida
- 1 tsp baking powder
- ¼ tsp baking soda
- ½ tsp salt
- 6 tbsp butter, at room temperature
- ¾ cup white, granulated sugar
- Whites of 2 eggs (not yolks!), at room temperature
- ¼ cup thick sour yogurt/sour cream (whatever is available)
- ¼ cup milk (whole cream is preferred but toned works too)
- Zest of one lemon
- 1 ½ tsp vanilla extract
For the cake topping
- ¼ cup unsalted butter, melted (not just softened)
- ½ cup brown sugar
- 5-6 large pineapple slices/8-10 medium sized pineapple slices (I used Del Monte)
- 15-16 maraschino cherries*
Note – if you do not have maraschino cherries available (I often do not) but have dried ones from which the pit has been extracted, then follow the following step
Heat 2 tbsp of sugar with a cup of water in a pan. Once the sugar dissolves completely, turn off the heat and soak the cherries in it for about 20 minutes or till they soak up the syrup and fluff up. Drain the water and pat the cherries dry before use.
METHOD
Preparing the topping
In this cake the topping goes at the bottom (remember, it is an upside down cake) so we will prepare it first.
I prefer to use a spring form cake tin about 9x9x3. However, you can use any regular tin too. If you use a spring form tin then just make sure that the sides lock tightly to seal the edges. That will avoid spillage.
- Grease a 9×9 inch baking round spring-form tin.
- Add the butter, for the topping, to the bottom of the tin.
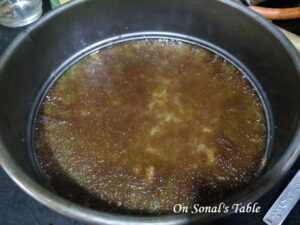

- Sprinkle the brown sugar on top. Make sure to evenly sprinkle it.
- Strain the juice from your pineapple slices and also pat them dry. The less the moisture, the fluffier will be the cake. Lay down the dried pineapple slices on top of the brown sugar in a circle. Halve 2-3 slices and place them on the sides too (as shown in image).


- Strain and pat dry your cherries and place them in the centre of the pineapple rings and in any vacant spaces.
- Cover the tin and keep in the fridge for at least 15 -20 minutes so that the butter and sugar mixture will firm up. This is essential.
Preparing the cake
- Preheat your oven to 180 deg C
- Sieve the flour, salt, baking soda and baking powder together and keep aside.
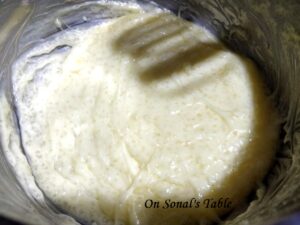
- In a mixing bowl, using a hand held mixer (I prefer that) whisk the butter until it turns soft and creamy. Add the sugar and continue whisking till the sugar is combined. The mixture should appear fluffier. One by one add the egg whites, whisking all the time. Add the sour yogurt/cream and vanilla essence. Continue whisking till all ingredients are well amalgamated. Add the milk and lemon zest and mix well.

- Tip in the dry ingredients little by little, whisking as you add.
- The entire process should take you about 4-5 minutes. Do not over whisk the batter. There is no need.
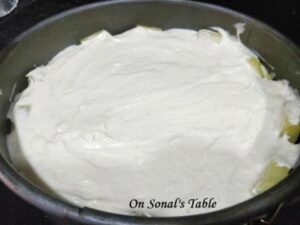
- Take out the cake tin from the fridge, remove the cover and pour the above batter on top of the topping layer. Smooth it out evenly with the help of a spatula.
- Now this cake takes a long time to bake. So, in order to avoid the sides burning, we need to cover it with an aluminium foil mid way.
- Bake the cake at 180 deg C. In a microwave oven it takes about 1 ½ hours to bake. In a regular oven it would take half the time i.e., 45 minutes. Keep check around the 40 minute mark for a regular oven. Midway during the baking time, gently cover the cake with the aluminium foil. The cake may rise up a bit and it may stick to the foil. That’s okay. Don’t worry because we are anyway going to serve it upside down. SO, how it looks while baking is not important.
- Perform the toothpick test to check if the cake is ready. This recipe makes for a moist cake so if the toothpick inserted into the centre of the cake comes out clean (just a few moist crumbs here and there), then you can switch off the heat. Let the cake sit in the oven for about 2-3 minutes before you take it out.


- Once out, IT IS VITAL, that you allow it to cool down completely. Say about 20 minutes or so. Only then run a knife around the edges to pry out any parts stuck. Then place a plate on the top and quickly, in a swift movement, invert the cake. It should slide out gently with the bottom facing on the top.


 That’s it. Enjoy!
-