Related Articles


This recipe won me a gold in a culinary competition organized by ‘The Chef’s Table studio’

Dum Pukht cooking is an ancient practice that is commonly associated with Mughlai cuisine. Many people believe that it finds its roots in ancient Persian cuisine. In India, this cuisine is more common in my home state of Uttar Pradesh as the erstwhile nawabs of Awadh (or Lucknow, the state capital, as we know it now) used this technique of cooking.
Dum Pukht cooking is basically a process of slow cooking savoury non vegetarian dishes with few spices in a heavy bottomed pan which is sealed at the top.
Over the years I have eaten Biryanis from various states of India. And, most of them use similar ingredients. However, my favourite remains the flavourful mutton dum biryani. This is a one pot dish which is cooked in a sealed pot. The seal allows the aromas of the spices to infuse into the dish. And, the result? Ah, the result is a delightful blend of tender meat and fragrant rice.
Although, there are many different recipes for this, mine is pretty simple. It does have quite a few steps though. So, If you are attempting this then I recommend reading the recipe once before completely before staring. Broadly classified, the steps are as follows:
- Making the masala paste
- Marinating the meat
- Cooking the meat
- Soaking and par boiling the rice
- And finally, layering the biryani and cooking it
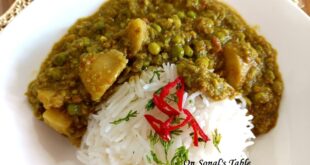
KEEMA AND EGG DUM BIRYANI
INGREDIENTS
Main ingredients
½ kg of Goat’s keema (mince meat)
1 large onion, sliced fine
2 large onions, sliced and deep fried till they are golden and crisp
¾ cup yoghurt/curd (approx 150-16- grams)
3 tbsp refined oil
½ cup finely chopped mint leaves
½ cup finely chopped coriander leaves
Dry spices
4 Bay Leaves,
1 stick of Cinnamon (daal chini)
1 tsp shahi zeera (black cumin seeds)
2 Green Cardamoms (elaichi)
2 black cardamoms (badi elaichi)
6-7 peppercorns
4-5 cloves (laung)
1 tsp schezwan peppercorns (naag kesar) – optional
2-3 star anise (chakr phool)
1 tbsp black stone flower (patthar phool or dagad phool) – optional
Other Ingredients
½ tsp Turmeric Powder
½ tsp pepper powder
1 ½ tsp Red Chili Powder
1 ¼ tsp Garam Masala Powder
Salt as per taste
1 tbsp kewra essence (if you don’t have this then use rose water)
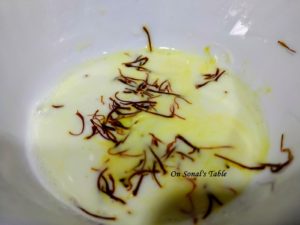
A few strands of saffron (soaked in 1 tbsp warm milk)
8-10 cashews (deep fried like the onions)
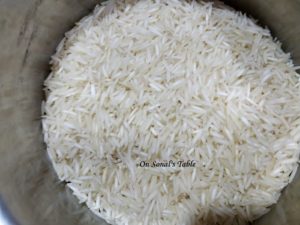
1½ Cup long grain basmati Rice (it needs to be basmati as that is the rice traditionally used for biryani’s. Wash the rice and soak it in water for 30 minutes)
3-4 hard boiled eggs
1 cup of dough made from whole wheat flour. We need this to seal the biryani pot.
1 cup masala paste
Preparation before cooking
Rice – wash and soak the basmati rice in water (at room temperature) for half hour/30 minutes.
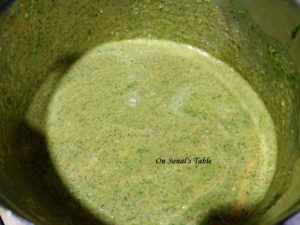
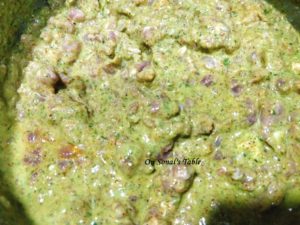
Masala Paste- grind the following ingredients into a smooth paste in a mixer. Add about 2 tbsp of water to ensure that you get a smooth paste with no lumps.
¼ Cup Fresh Coriander leaves
¼ Cup fresh Mint leaves
1 tbsp ginger-garlic paste
Juice of one lime
4-5 Green Chilies (or as per taste)
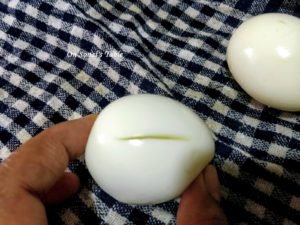
Boiled eggs – shell and deep fry the eggs too till the exterior is golden. Note – make a small incision in each egg before deep frying. That will ensure that as the egg interior heats up in the hot oil, any moisture will evaporate out of the slit. Otherwise, the egg could burst open in the oil and you could burn your hand in the process
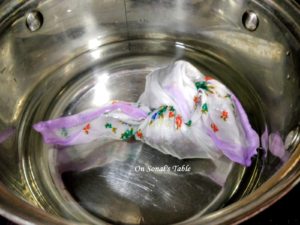
Bouquet garni/potli – This is a piece of fine muslin cloth (you can use an old kerchief) in which spices are tied. To make this, spread the cloth on the kitchen counter and add all of the dry spices mentioned in the ingredients to it. However, use only 2 bay leaves. We shall use the other two during the cooking of the keema. Tie up the spices securely in the garni and keep aside.


METHOD
Now, let’s get down to cooking the biryani.
- Marinating the meat – as a first step, marinate the mutton mince in the following
- Prepared masala paste
- ¾ cup curd
- ½ tsp turmeric powder
- ½ tsp pepper powder
- 1 ¼ tsp garam masala powder
- Salt (as per taste)
- 1 ½ tsp red chilli powder
Make a blend of the above and marinate the meat in it for at least 15 minutes.
- Heat the oil in a pan for deep frying and fry the eggs, cashews and onions and keep them aside. We will use them for layering the biryani.
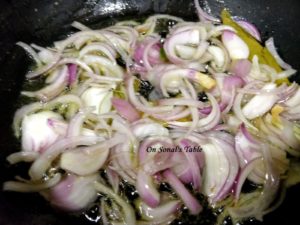
- In a separate pan heat 3 tbsp of oil and add the sliced onions and 2 bay leaves. Let the onions brown (will take about 5 minutes) before adding the mutton mince and the marinade.
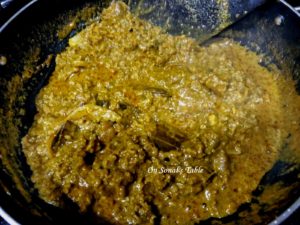
- Cook on high heat for about 15-20 minutes till the meat is about 3/4th We are not looking to cook it completely as it will cook again when we layer the biryani and cook it. After about 15-20 minutes, the water in the meat will have evaporated. Remember, we are not looking to make the meat completely dry. We need some water as the rice will cook in it later.
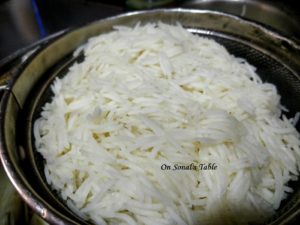
- Whilst the mutton mince is cooking lets par boil the rice. Take about 7-8 cups of water in a vessel and add the bouquet garni to it. Bring that to a boil. Once it starts boiling, add the rice. Reduce the heat to medium and cook for about 5 minutes only. Like the meat, we need to cook the rice 3/4th It needs to remain al dente (slightly undone). At the end of 5 minutes, switch off the heat. Fish out the bouquet garni and squeeze it over the water to release any residual flavour. (It will be quite hot so remember to squeeze it between two table spoons). Leave the rice in this water for about 1 more minute and then strain it. Remove any excess water and spread the rice in a plate to let it dry a bit. Keep it in an airy place.
Now that the rice and keema are partially cooked, we can start layering the biryani.
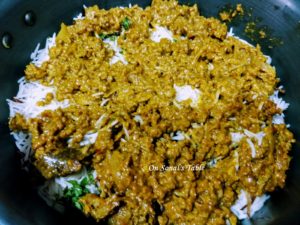
- Take a heavy bottomed pan that has a tight lid with no aperture/hole at the top. Layer the bottom of this with half of the keema. If the keema is too dry then add about 2 tbsp of water. Add half of the rice on top of this. Spread it out evenly. Sprinkle half of the fried onions and half of the chopped mint on top. Now, this part constitutes the first layer. We need to repeat this for the second layer too. For that, just repeat the process. On top of the fried onion and mint leaves layer the remaining keema. Add the final layer of rice and sprinkle all of the fried onions and mint leaves.

- Once done with the final layer, strew the fried cashews on top. Cut your boiled and fried eggs in half and lay them down (insides facing down) over the biryani.
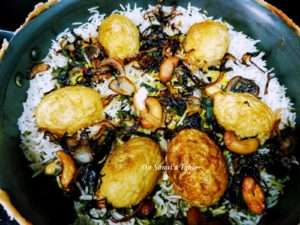
- Pour the kewra essence and saffron milk (with the strands) on top.
- Cover the pan with the lid and seal the edges with the dough.
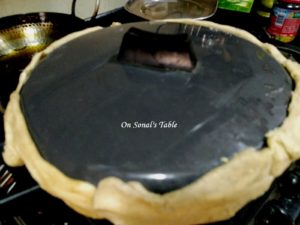
- Your biryani pot is now ready.
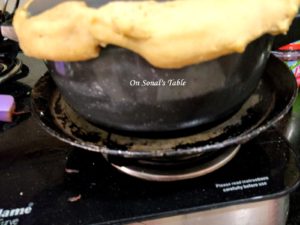
- Place the biryani pot on the stove on high heat for about 3-4 minutes. Do not extend the time as your food will burn otherwise.
- Simultaneously on the other burner place a girdle pan or a flat pan. Let that heat up and then reduce the heat to sim/low. After 3-4 minutes of cooking the biryani on high, take the pot off the heat and place it over the heated girdle. Now, let it cook like this for another 10-12 minutes.
- After 10-12 minutes, switch off the heat and remove the biryani pot from the girdle. Let it sit for about 10 more minutes before cracking open the seal.
- Your biryani is now ready. Enjoy it hot with some mint chutney and a flavourful vegetable raita.